How to automatically send emails from google sheets? Sending automatic emails from Google Sheets can save time and streamline processes. Using Google Apps Script, you can automate sending emails with data from your Google Sheets. Here is a simple guide to help you understand and implement this.
Step-by-Step Guide
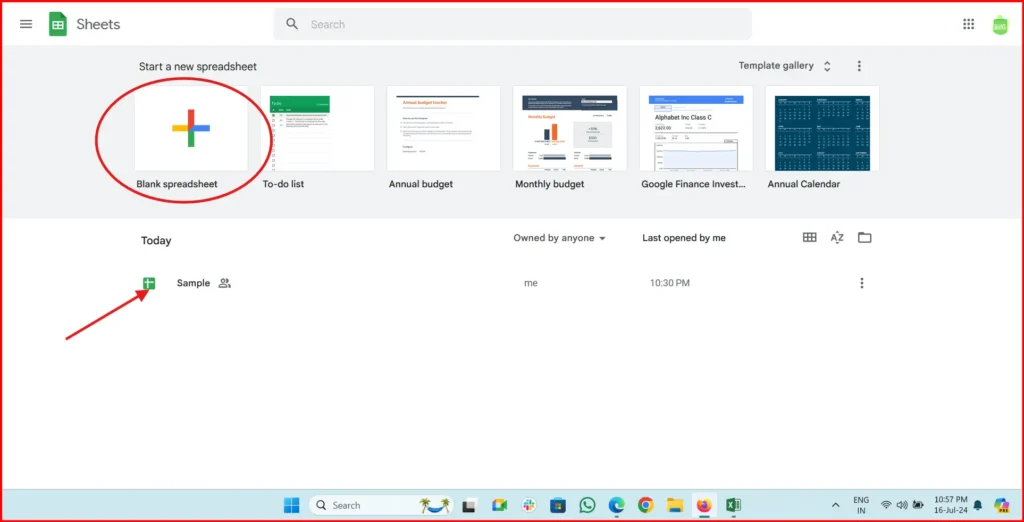
Step 1: Open Google Sheets
- Open Your Google Sheets:
- Go to your Google Drive and open the Google Sheets file you want to send automatic emails from.
- Make sure you have your data organized in the sheet. For example, if you are sending a stock report, ensure the data is arranged in a table format.

How to open Google sheet
- Make sure you have your data organized in the sheet. For example, if you are sending a stock report, ensure the data is arranged in a table format.
- Open Your Google Sheets:
Step 2: Open Script Editor
- Access the Script Editor:
- Click on
Extensionsin the top menu.
- Click on
- Select
Apps Script. This will open the Google Apps Script editor in a new tab.
How to open the apps script editor in google sheet
- Select
- Access the Script Editor:

Step 3: Write the Script
- Copy and Paste the Script:
- In the script editor, delete any existing code and paste the following code:

How to open Apps Script code editor
- In the script editor, delete any existing code and paste the following code:
- Copy and Paste the Script:

function b2c_reportv2() {
  var sheet = SpreadsheetApp.getActiveSpreadsheet().getActiveSheet();
  var date = new Date();
  var formattedDate = Utilities.formatDate(date, Session.getScriptTimeZone(), 'dd-MMM-yyyy : EEEE');
  var subject = "B2C available stock report - " + formattedDate;
  var recipients = "sumitdigital.tech@gmail.com";
  var bccmail = "";
  var ccmail = "";
var mailname = “Isahayata.com”;
var data1 = sheet.getRange(‘b2c report!A1:G10’).getValues();
// HTML mail body code
Logger.log(data1);
var email_body = ‘<html><body> Hi Team, <br><br>Please find below bin wise POS Device stock report. <br><br> <table style=”border-collapse: collapse; width: 80%;”><tr>’;
// Fastag report data
for (var row = 0; row < data1.length; ++row) {
// Skip empty rows
if (data1[row].every(cell => cell === “”)) {
continue;
}
// Special handling for specific headings
if (data1[row][0] == “B2C available stock report”) {
email_body += ‘<tr><th colspan=”7″ style=”text-align: center; font-family: Calibri; color: #fcfafc; font-weight: bold; background-color: #848285; font-size: 18px;”>’ + data1[row][0] + ‘</th></tr>’;
continue;
}
email_body += ‘<tr>’;
for (var col = 0; col < data1[0].length; ++col) {
var cellValue = data1[row][col];
// Skip empty cells
if (cellValue === “”) {
continue;
}
// Headings
if (row == 1) {
email_body += ‘<th style=”text-align: center; font-family: Calibri; color: white; font-weight: bold; background-color: #8c2fc2; font-size: 16px;”>’ + cellValue + ‘</th>’;
}
// Data
else {
email_body += ‘<td style=”text-align: center; font-family: Calibri; color: #0a0a0a; font-weight: bold; background-color: #fafafa; font-size: 18px;”>’ + cellValue + ‘</td>’;
}
}
email_body += ‘</tr>’;
}
email_body += ‘</table><br><br> Thanks and Regards <br>Isahayata.com </body></html>’;
  MailApp.sendEmail(recipients, subject, "", { htmlBody: email_body, cc: ccmail, bcc: bccmail, name: mailname });
}

//How to automatically send emails from google sheets with Apps script
Step 4: Save the Script
- Save the Script:
- Click on the disk icon or go to
File>Save.
- Click on the disk icon or go to
- Give your project a name, such as “Email Automation”.

How to write the apps script code
- Give your project a name, such as “Email Automation”.
- Save the Script:

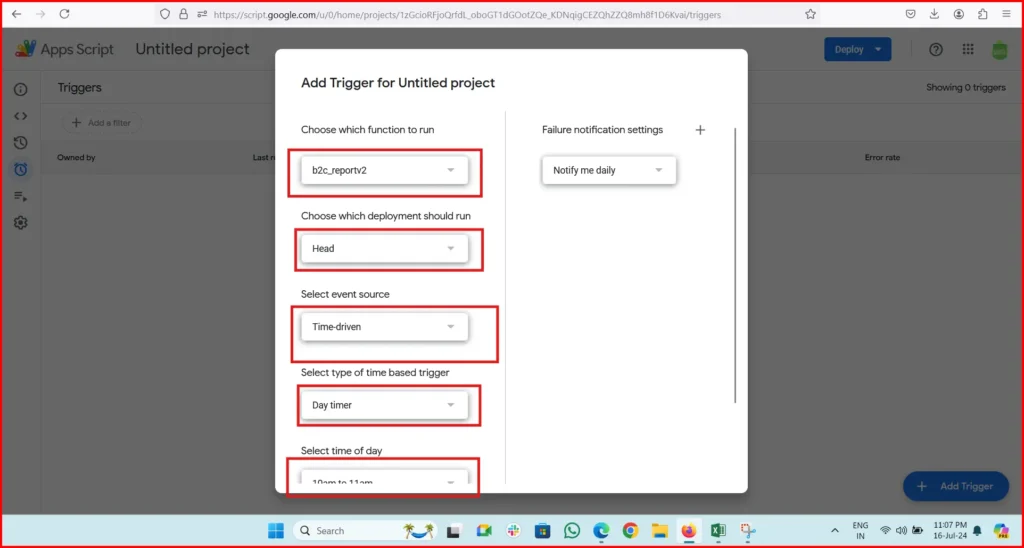
Step 5: Set Up Triggers
To automate the sending of emails, you need to set up a trigger:
- Open Triggers:
- In the script editor, click on the clock icon (Triggers) on the left side.

How to trigger apps script from google sheet
- In the script editor, click on the clock icon (Triggers) on the left side.
- Open Triggers:

- Add a New Trigger:
- Click on
+ Add Triggerin the bottom right corner.
How to add the trigger
- Click on
- Choose the function
b2c_reportv2.
- Choose the function
- Select
Time-drivenfrom the “Select event source” dropdown.
- Select
- Choose how often you want the emails to be sent (e.g., daily, weekly).
- Click
Save.
- Click
- Add a New Trigger:

Step 6: Authorize the Script
The first time you run the script, it will ask for authorization:
- Authorize:
- Click
Review Permissions.
- Click
- Choose your Google account.
automated mail using apps script
- Choose your Google account.
- Some case may give alert but don’t Might ask for unsafe access worry this your google sheet, click Go To (Unsafe)

- Click
Allow.
apps script google sheets google sheets script examples
- Some case may give alert but don’t Might ask for unsafe access worry this your google sheet, click Go To (Unsafe)
- Authorize:


Step 7: Test the Script
- Run the Script:
- Go back to your Google Sheets.
- Run the script by clicking on the play icon in the script editor or by going to
Run>Run function>b2c_reportv2.how to run app script in google sheets
- Run the script by clicking on the play icon in the script editor or by going to
- Run the Script:

- Check Your Email:
- Check your email to see if the report has been sent.

how to run script in google sheets - See the mail results

google app script html examples
- Check your email to see if the report has been sent.
- Check Your Email:


Understanding the Script – How to automatically send emails from google sheets with Apps script
1. Getting the Spreadsheet and Sheet
var sheet = SpreadsheetApp.getActiveSpreadsheet().getActiveSheet();
This line gets the active spreadsheet and the active sheet within it.
2. Formatting the Date
var date = new Date();
var formattedDate = Utilities.formatDate(date, Session.getScriptTimeZone(), 'dd-MMM-yyyy : EEEE');
This code gets the current date and formats it.
3. Setting Email Details
var subject = "B2C available stock report - " + formattedDate;
var recipients = "sumitdigital.tech@gmail.com";
var bccmail = "";
var ccmail = "";
var mailname = "Isahayata.com";
These lines set the subject, recipient email, and other email details.
4. Getting the Data
javascriptCopy codevar data1 = sheet.getRange('b2c report!A1:G10').getValues();
This line gets the data from the specified range in the sheet.
5. Creating the Email Body
javascriptCopy codevar email_body = '<html><body> Hi Team, <br><br>Please find below bin wise POS Device stock report. <br><br> <table style="border-collapse: collapse; width: 80%;"><tr>';
This line starts the HTML body of the email.
6. Looping Through the Data
for (var row = 0; row < data1.length; ++row) {
  if (data1[row].every(cell => cell === "")) {
    continue;
  }
if (data1[row][0] == “B2C available stock report”) {
email_body += ‘<tr><th colspan=”7″ style=”text-align: center; font-family: Calibri; color: #fcfafc; font-weight: bold; background-color: #848285; font-size: 18px;”>’ + data1[row][0] + ‘</th></tr>’;
continue;
}
email_body += ‘<tr>’;
for (var col = 0; col < data1[0].length; ++col) {
var cellValue = data1[row][col];
if (cellValue === “”) {
continue;
}
if (row == 1) {
email_body += ‘<th style=”text-align: center; font-family: Calibri; color: white; font-weight: bold; background-color: #8c2fc2; font-size: 16px;”>’ + cellValue + ‘</th>’;
} else {
email_body += ‘<td style=”text-align: center; font-family: Calibri; color: #0a0a0a; font-weight: bold; background-color: #fafafa; font-size: 18px;”>’ + cellValue + ‘</td>’;
}
}
  email_body += '</tr>';
}
This code loops through the rows and columns of the data and builds the HTML table.
7. Sending the Email
email_body += '</table><br><br> Thanks and Regards <br>Isahayata.com </body></html>';
MailApp.sendEmail(recipients, subject, "", { htmlBody: email_body, cc: ccmail, bcc: bccmail, name: mailname });
This code finalizes the HTML body and sends the email using MailApp.sendEmail.
Detailed Explanation
Getting the Active Spreadsheet and Sheet
SpreadsheetApp.getActiveSpreadsheet(): This function retrieves the active spreadsheet that you are working on.
getActiveSheet(): This function gets the currently active sheet within the spreadsheet. Together, these lines of code ensure that the script is working with the correct sheet.
Formatting the Date
new Date(): This creates a new date object with the current date and time.
Utilities.formatDate(): This formats the date into a specific string format,dd-MMM-yyyy : EEEE, which will look something like “16-Jul-2024 : Tuesday”.
Setting Email Details
var subject: This sets the subject of the email, including the formatted date.
var recipients: This sets the email address to which the email will be sent.
var bccmailandvar ccmail: These are for setting the BCC and CC addresses, if any. They are currently empty.
var mailname: This sets the name that will appear as the sender of the email.
Getting the Data
getRange('b2c report!A1:G10'): This specifies the range of cells in the sheet from which to get data. In this case, it gets data from columns A to G and rows 1 to 10.
getValues(): This function retrieves the values from the specified range as a two-dimensional array.
Creating the Email Body
var email_body: This initializes the email body as an HTML string. It starts with a greeting and a brief introduction, followed by an opening<table>tag.
Looping Through the Data
for (var row = 0; row < data1.length; ++row): This loop iterates through each row of data.
if (data1[row].every(cell => cell === "")): This checks if the row is empty and skips it if true.
if (data1[row][0] == "B2C available stock report"): This checks if the row contains a specific heading and formats it accordingly.
- The nested loop (
for (var col = 0; col < data1[0].length; ++col)) iterates through each cell in the row, adding the data to the email body with appropriate HTML tags.
- The nested loop (
Sending the Email
MailApp.sendEmail(recipients, subject, "", { htmlBody: email_body, cc: ccmail, bcc: bccmail, name: mailname }): This function sends the email with the HTML body created earlier, along with any CC or BCC addresses and the sender’s name.
Tips and Best Practices
- Test Your Script:
- Always test your script with your email before setting it to run automatically. This ensures that the script works as expected and the email format looks good.
- Test Your Script:
- Error Handling:
- Consider adding error handling to manage issues gracefully. For example, you can use
tryandcatchblocks to handle potential errors during script execution.
- Consider adding error handling to manage issues gracefully. For example, you can use
- Error Handling:
- Security:
- Be mindful of the security of your script, especially when dealing with sensitive data. Ensure that only authorized users have access to the script and the data it uses.
- Security:
- Debugging:
- Use
Logger.log()statements to output values and debug your script. This can help you understand what the script is doing and identify any issues.
- Use
- Debugging:
- Documentation:
- Add comments to your script to explain what each part does. This makes it easier to understand and maintain the script, especially if others will be using it.
- Documentation:
By following these steps and best practices, then How to automatically send emails from google sheets with Apps script? will automate the process of sending emails from Google Sheets, making your workflow more efficient and less prone to manual errors.


Pingback: How to Delete Row Based on Cell Value in Google Apps Script